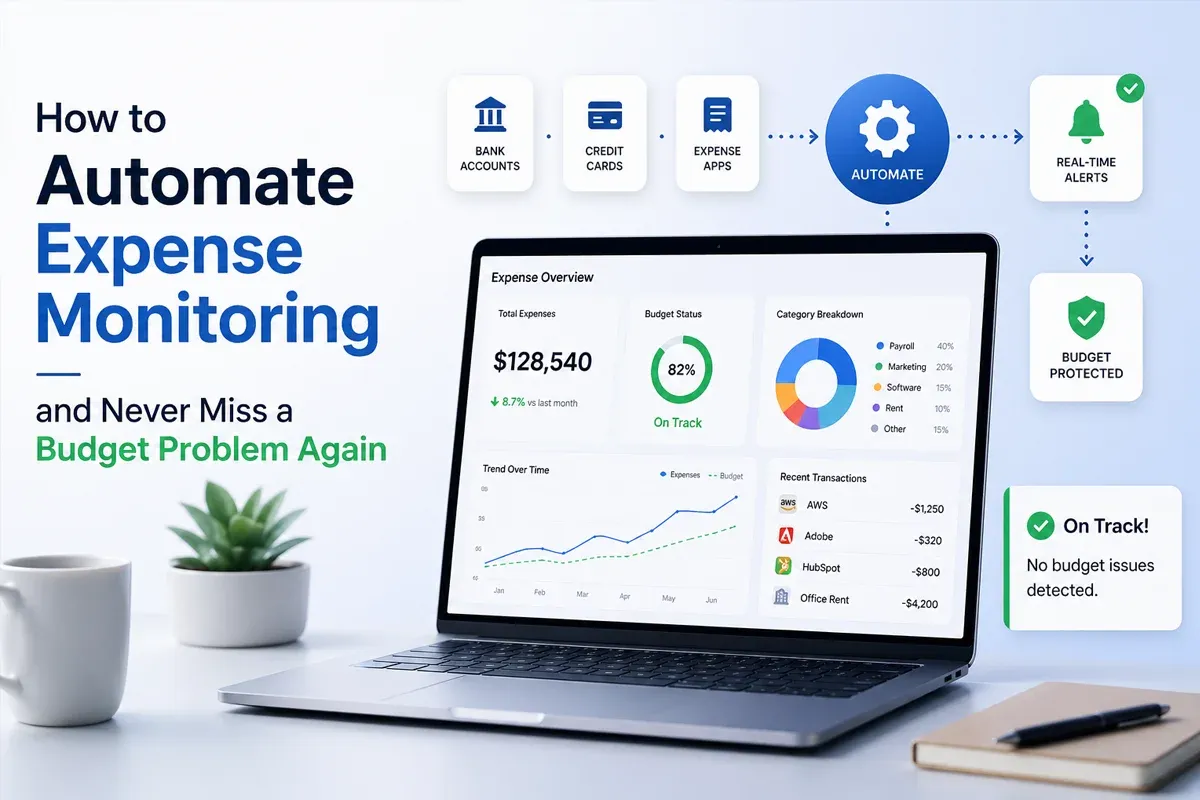
Most people assume they know where their money goes. They are usually wrong. Studies consistently show that people underestimate their discretionary spending by twenty to forty percent. The subscriptions you forgot about, the restaurant runs that blur together, the small charges that never feel significant in the moment — they add up faster than any manual review catches them. Automated expense monitoring exists to close that gap without requiring willpower or discipline.
Setting up alerts takes less than an hour across your accounts. Done right, you stop surprises before they become overdrafts, catch fraud before it compounds, and start seeing your actual spending patterns instead of the story you tell yourself. This guide walks through exactly how to do it — which alerts matter, how to calibrate thresholds, and how to make the whole system require almost no ongoing effort.
Why Manual Expense Tracking Fails Over Time

Manual tracking — whether spreadsheets, pen-and-paper, or mental accounting — fails for a predictable reason: it requires consistent effort at the exact moments you are least motivated. You track carefully in January. By March, reviews are weekly. By June, you are doing a monthly summary and rounding everything. By fall, the spreadsheet is six weeks behind and feels pointless.
The problem is not character. It is system design. Manual methods depend on you doing the same repetitive task over and over without external reward or consequence. Automated alerts remove that dependency by doing the monitoring passively — you only have to act when something actually needs your attention.
The Six Types of Alerts Worth Setting Up
Not all financial alerts are equally useful. Some apps and banks bury you in notifications that train you to ignore everything. The goal is a targeted set of alerts that each carry real signal.
- Large transaction alerts: Triggered when a single charge exceeds a threshold you set. Catches billing errors, fraud, and impulsive purchases before you rationalize them.
- Low balance alerts: Notifies you when a checking or savings account drops below a floor you define. Prevents overdraft fees and forces a real-time decision before you spend further.
- Monthly category budget alerts: Sent when spending in a category — restaurants, subscriptions, shopping — hits a percentage of your monthly cap. Gives you time to adjust before you exceed it.
- Unusual activity alerts: Flags transactions that deviate from your normal patterns: purchases in unfamiliar cities, merchant categories you rarely use, or multiple charges in quick succession. These are your first line of fraud defense.
- Bill payment confirmation alerts: Confirms that a scheduled payment went through. Prevents the quiet failures — a lapsed auto-pay that turns into a late fee and a credit hit.
- Income deposit alerts: Confirms when a paycheck, transfer, or freelance payment lands. Useful for coordinating bill timing and confirming that nothing was delayed.
How to Set Up Automated Expense Alerts Step by Step

The setup process is nearly the same whether you use your bank's native app or a third-party aggregator. The main difference is breadth: your bank only sees its own accounts, while aggregators like Copilot, Monarch Money, or YNAB can consolidate multiple institutions.
Consolidate your accounts in one place
Start by listing every account that generates spending: checking, savings, credit cards, and any connected payment apps. Monitoring only one account while ignoring others creates blind spots. If you use a third-party app, connect all your institutions during initial setup — including the credit cards you use for rewards but rarely think of as "spending."
Enable your bank's built-in alerts first
Before adding any third-party tool, turn on your bank's native alert system. Most major banks offer real-time push notifications for transactions, low balances, and unusual activity at no cost. These alerts come directly from your bank without your data touching an intermediary, which makes them the most secure option.
Set category budgets and link them to alerts
Look at ninety days of actual spending and set category caps that are slightly above your current average — not what you wish you spent. For most people, dining, subscriptions, and shopping are the categories that drift. Set alerts at seventy-five percent of your cap for each so you have time to adjust before you exceed it.
Configure large transaction thresholds per card
A $200 threshold makes sense on an everyday debit card but may produce too many alerts on a card you use for large purchases. Calibrate the threshold to how you actually use each card. For fraud detection, lower is better — even a $1 test charge from a fraudster can precede a larger one.
Choose your delivery channel deliberately
Push notifications are best for time-sensitive alerts like unusual activity and large transactions. Email works for weekly summaries and bill confirmations — it is easier to review in bulk and harder to dismiss without acknowledging. SMS is a good fallback if you are not reliable about checking specific apps. Do not use all three for the same alert or you will start tuning them out.
What Alert Thresholds Should You Actually Set?
Thresholds that are too low produce alert fatigue. Thresholds that are too high miss the problems worth catching. Here is a starting framework based on common spending patterns — adjust for your own numbers.
- Large transaction alert: $100–$200 on everyday debit cards; $300–$500 on primary credit cards
- Low balance alert: One month of fixed expenses as your floor (e.g., $2,000 if fixed costs are $2,000/month)
- Category budget alert: 75% of your monthly cap for dining, shopping, and entertainment
- Subscription monitoring: Flag any recurring charge over $15/month that is not on your known list
- Unusual activity: Any transaction at a merchant category you never use, or any transaction over $50 outside your home metro
Automated monitoring pairs naturally with the 50/30/20 rule. When each category is wired with an alert at its cap, the math enforces itself without spreadsheets.
Free vs Paid Expense Monitoring Tools

Your bank's native alerts are free and adequate for basic coverage. Paid aggregators offer more context: categorization, trend charts, and alerts layered across multiple institutions. Whether the upgrade is worth it depends on how spread out your money is and how much you value the consolidated view.
Free Bank Alerts vs Paid Aggregators
✓ Pros
- Free bank alerts: no third-party data sharing risk
- Instant alerts straight from the source
- Zero cost, available on every major bank
- Paid tools: unified view across all accounts and cards
- Smarter categorization and spending trend analysis
- Budget goal tracking with visual progress
✗ Cons
- Free bank alerts: only cover that bank's accounts
- Limited categorization and no cross-account analysis
- No budget cap alerts across categories
- Paid tools: $5–$15/month per app adds up
- Requires granting data access to a third party
- Connection breaks are common and require re-authentication
A reasonable default: use your bank's built-in alerts for transactions and balances, then add one paid aggregator only if you have accounts at multiple institutions and want consolidated category tracking. Most people do not need both.
Signs You Are Ignoring Your Alerts — and Why That Costs You
Automated alerts only work if you act on them. A common failure mode is setting everything up correctly and then dismissing every notification without reading it. These are the warning signs that your system has become noise.
- You swipe away alerts without checking the merchant name. One dismissed alert per day is forty forgotten charges per month.
- Your low balance alert fires every pay cycle. This means your floor is too high, or you are spending more than you earn before your paycheck arrives.
- You have recurring charges you cannot explain. Subscriptions you stopped using but never cancelled stay invisible without regular monitoring.
- You found out about overdraft fees after the fact. Real-time alerts exist specifically to prevent this — missing them means the setup is not reaching you in the right channel.
- Your credit card balance surprises you at statement time. You should never reach a statement and be surprised by the total if transaction alerts are working.
- You have not reviewed your alert settings in over six months. Life changes — income, expenses, new accounts — make old thresholds irrelevant.
How to Do a Monthly Alert Review in Under Ten Minutes

The system runs on autopilot between reviews, but a brief monthly check keeps thresholds calibrated and catches anything that slipped through. The goal is awareness, not a full audit.
- Open your bank or aggregator app and scan the last 30 days of transactions. Flag anything unexpected.
- Check which category alerts fired. If the same category fired every week, your cap is either too low or the spending is worth addressing.
- Look for any new recurring charges — subscriptions, trial conversions, or annual renewals you forgot about.
- Confirm your low balance thresholds still make sense relative to your current income and fixed costs.
- Check that all account connections are still active. Disconnected feeds create silent blind spots.
- Cancel any subscription you cannot justify in under five seconds.
Common Mistakes When Setting Up Expense Monitoring
- Setting thresholds based on goals, not reality: Aspirational caps cause constant alerts that train you to ignore everything.
- Only monitoring one account: Spending on ignored cards does not disappear — it just goes untracked until the damage is done.
- Using too many apps at once: Three overlapping tools with redundant alerts creates notification chaos and decision fatigue.
- Never reviewing alert history: Alerts that fired but got dismissed are data. Looking back monthly reveals patterns you would otherwise miss.
- Ignoring security hygiene: Apps connected with your banking password (not OAuth) or apps you no longer use are active liabilities. Audit access annually.
- Giving up after one missed alert: One failure does not break the system. The value of automated monitoring is cumulative — the catches you make over months and years matter more than any single event.
How to Build a Complete Automated Monitoring System
Once you understand the components, pulling everything together takes one focused session:
Audit every active account and card
List every account where money moves. Include checking, savings, all credit cards, investment accounts with linked debit, and payment apps like Venmo or Cash App. Any account left out of your monitoring system is a gap a fraudster or surprise charge can exploit.
Enable native bank alerts on each institution
Log into each bank or card's app and turn on transaction alerts, low balance alerts, and unusual activity flags. This takes about five minutes per institution and is free. It is the foundation of the whole system.
Connect to an aggregator if you have multiple institutions
If you have accounts across more than one bank, a budgeting aggregator gives you the consolidated category view you cannot get from individual bank apps. Connect all accounts during the initial setup and map them to consistent category names.
Schedule a quarterly threshold review
Put a thirty-minute calendar event on the first weekend of each quarter. Review which alerts triggered, adjust thresholds for any categories that have shifted, and revoke access for any apps you stopped using. The system degrades without maintenance, but maintenance takes very little time if it is scheduled.
Expense Monitoring Setup Checklist
- List every account and card where money moves
- Enable native alerts on each bank or card app
- Set calibrated thresholds, not aspirational ones
- ∼ Large transaction: $100–$200 on everyday accounts
- ∼ Low balance: one month of fixed expenses as the floor
- ∼ Category caps: alert at 75% of your monthly limit
- Connect to a budgeting aggregator if you use multiple banks
- Choose one delivery channel per alert type (push, email, or SMS)
- Schedule a monthly 10-minute review to scan flagged transactions
- Audit third-party app permissions every quarter
- Cancel any unrecognized recurring charge immediately
Frequently Asked Questions About Automated Expense Monitoring
Is it safe to connect a budgeting app to my bank account?
How is automated monitoring different from just checking my bank app?
What is the best free tool for expense monitoring?
How many alerts should I have set up?
What should I do when an alert fires for something unexpected?
Conclusion
Automated expense monitoring does not make you a better spender on its own. What it does is remove the information delay that lets small problems become large ones. When you know about a fraud charge the day it happens, a runaway subscription the month it starts, or a budget category creeping over limit before the month ends, you have options. When you find out weeks later, you usually just absorb the damage.
The setup takes less than an hour. The ongoing maintenance takes ten minutes a month. And the compound benefit — fewer fees, faster fraud recovery, cleaner spending habits — adds up to real money over time. If you want to put those savings to work, pair this system with a structured budget framework like the 50/30/20 budgeting method to make sure the money you stop wasting actually goes somewhere useful.